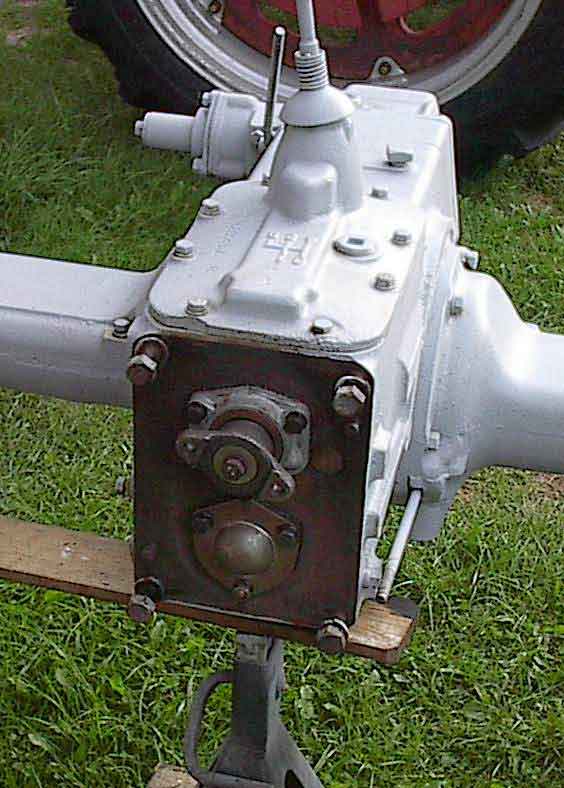
This is the front of the transmission after replacing the seal. Large quantities of caked oil and dirt were removed first. The seal in question seats in the upper collar behind the yoke. I first encountered this joint when working on RedRev's M, and it's impressive that all the power gets to the tranny through so small a joint. In the larger view I guess what makes tractors different from cars it that more of the strain of a load is absorbed in the gears behind this joint.
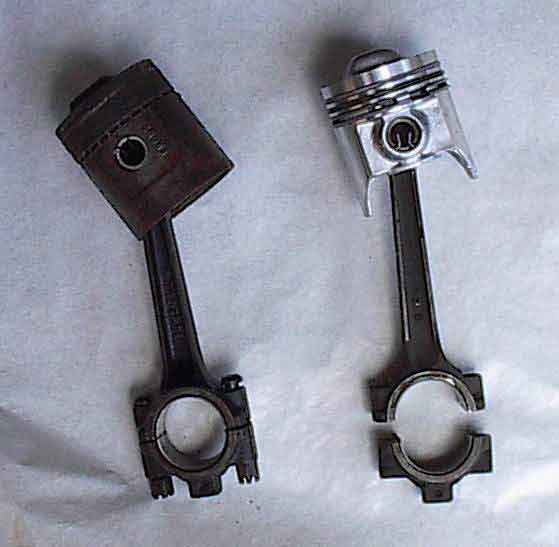
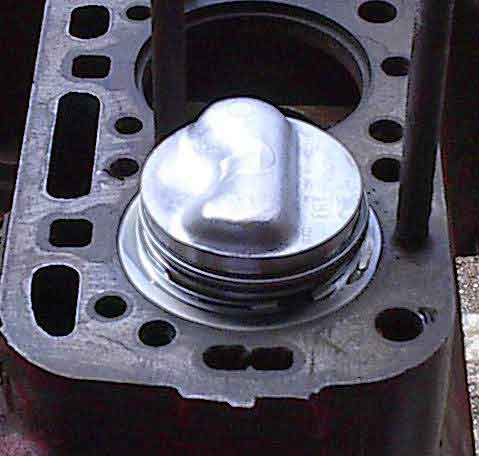
Old piston to the left, new to the right. There's not quite enough detail at this scale and resolution to see it, but the rings on the old piston were firmly embedded in their grooves, cemented with rust and sludge. The photo on the right is of No. 1 ready for one last slathering in 30 weight before the ring compressor is wrapped on and the whole shebang tapped down into place.
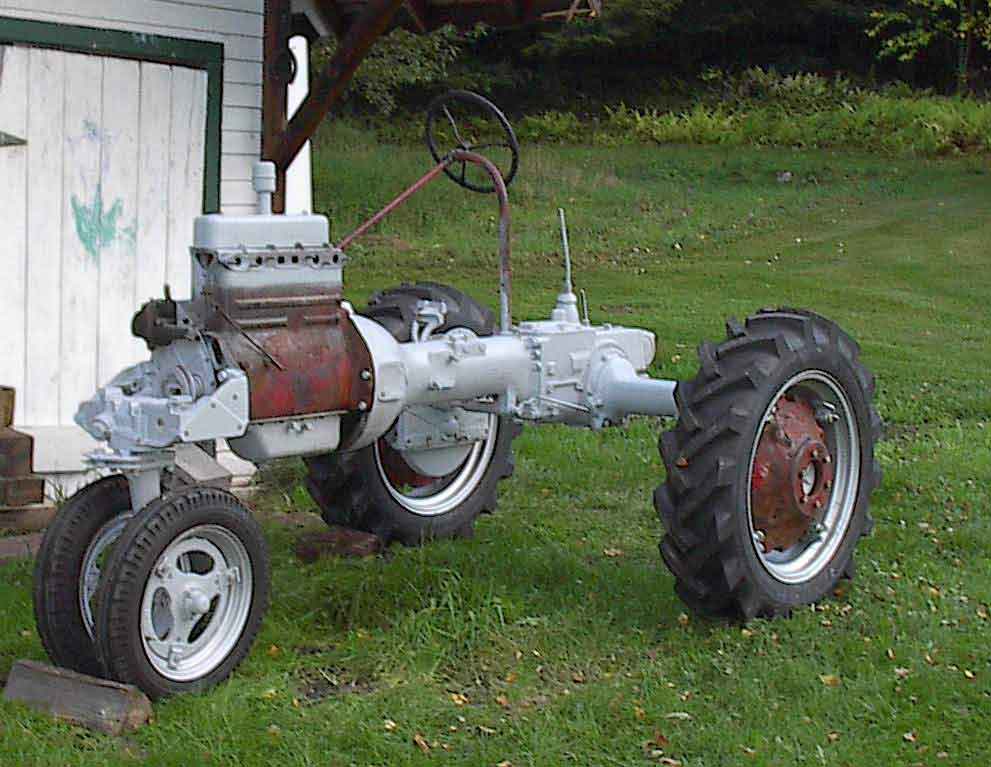
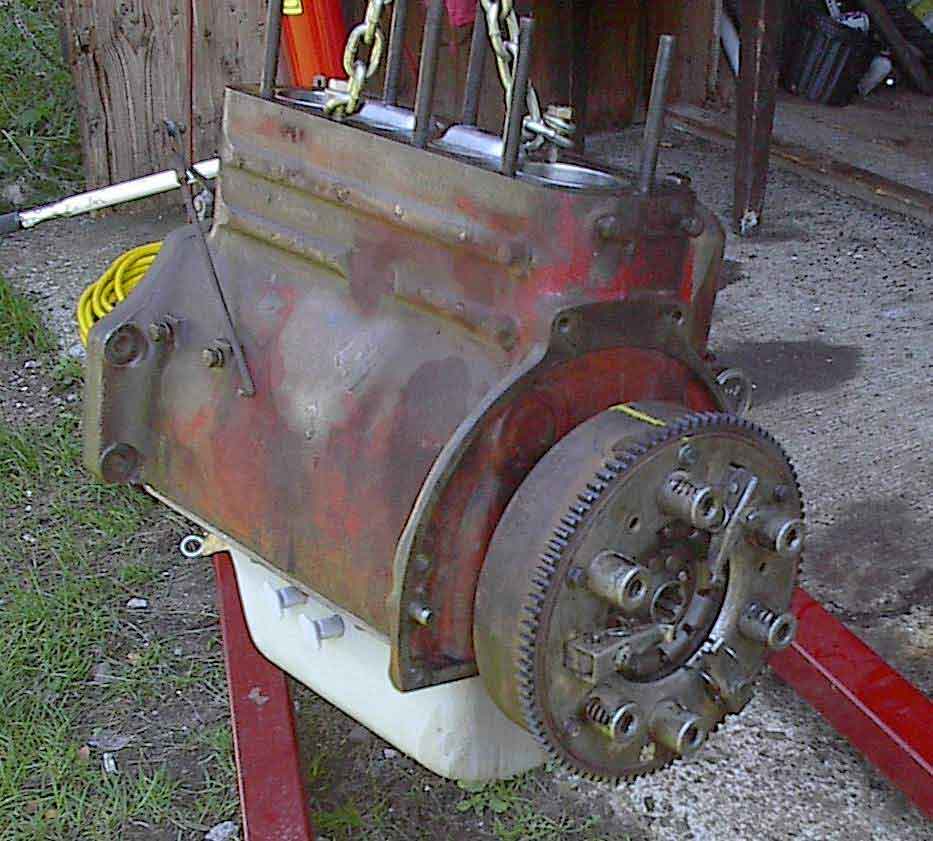
Here's the motor ready to be mounted back to the torque tube. Sleeves and pistons are all in and the pan back on. The clutch assembly has been cleaned up and adjusted to specs, and the disc centered by eye. Gayle raised an eyebrow when I got out the rattle can of off-brand John Deere yellow to put that stripe on the flywheel. IH marked top dead center on their flywheels, but they didn't put a lot of gumption into stamping the mark. The TDC index can be pretty hard to find and a brightly colored stripe will be a lot easier to see when I get to setting valves and timing. The motor went back on pretty easily. My eyeball lineup of the clutch was close enough that all I had to do was engage the PTO and give it a little twist for everything to go right together. Well, not quite all. The job required a good bit of raising and lowering both the engine hoist and the jack under the torque tube to get things lined up. Once I had that line right, a little twist on the PTO and things slid home really nicely.
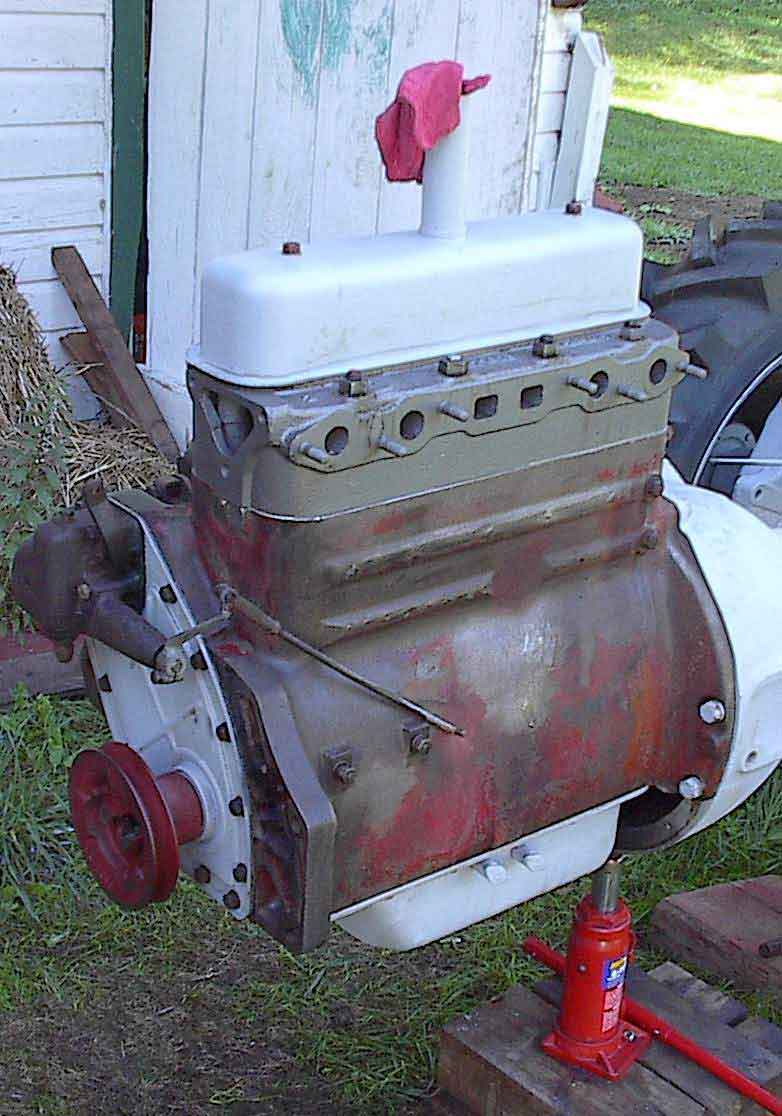
With the motor mounted back, the first order of business was to get the top end closed up. The picture to the left is a little out of sequence in that I sandblasted and primed the oilpan, timing cover, air cleaner and valve cover earlier. The shop did a really nice job on the head. The water damage was bad enough that they had to replace everything -- valves, guides, springs, keepers -- and mill out for valve seat inserts. The job included baking the head to break up the corrosion and crud, shot blasting and priming. A far better experience than I had with the shop that did the head on my SuperC.